Search Results for: rv camping

20 Awesome Camping Hacks to Make Your Next Trip Easier

Camping can be a lot of fun, but it can also bring a lot of hassle. We have been camping for decades, and our experience in the outdoors has helped us learn some pretty great camping hacks along the way to help us spend less time on the hassle and more time enjoying the outdoors.

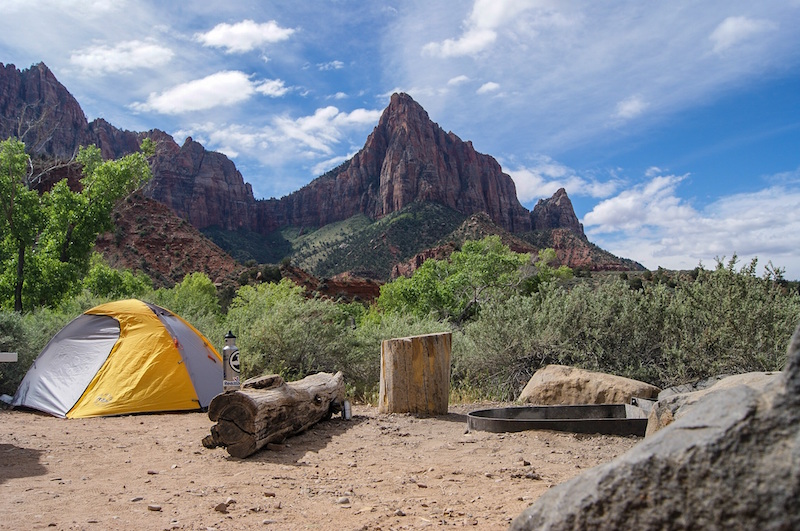
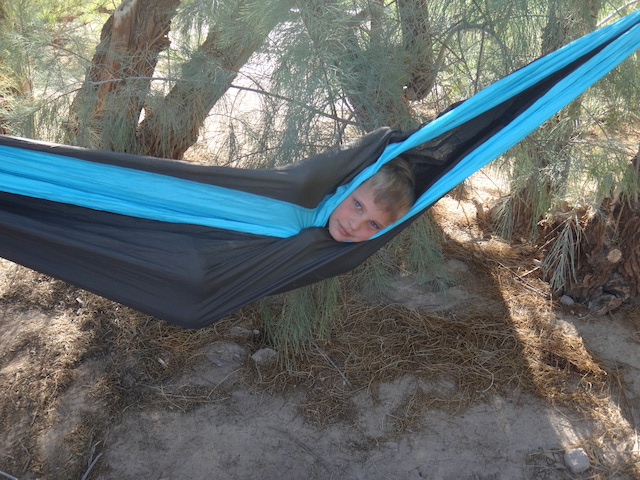
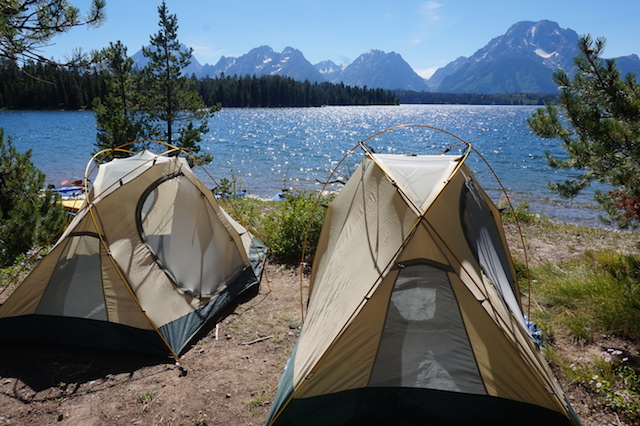
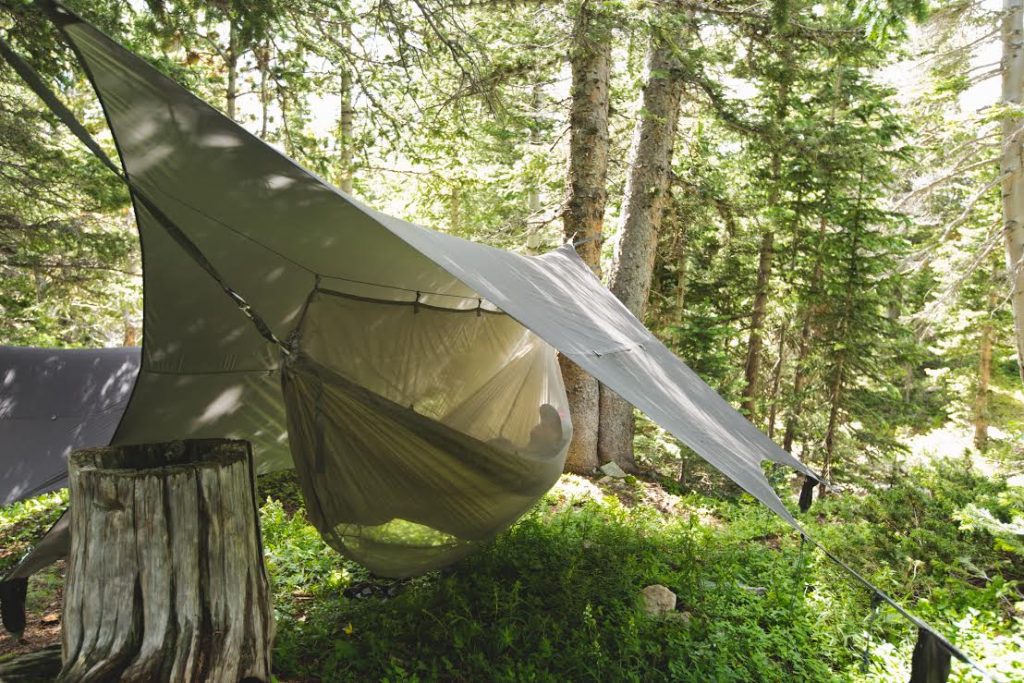
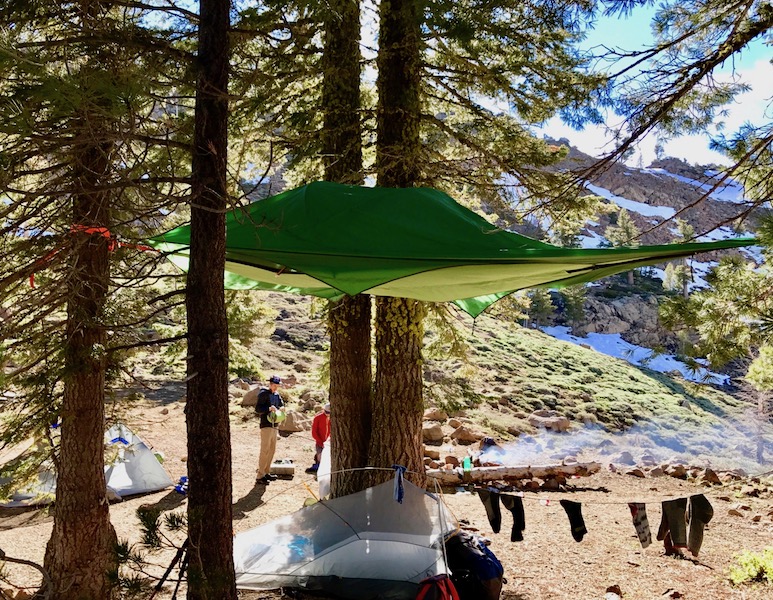
Glossy magazine covers and campground brochures highlight fun-filled days at the lake or river, restful afternoons lying in a hammock slung between two trees, roasting marshmallows by the fire, and snuggling into cozy sleeping bags at night.

furnace-creek-campground

If this idealized version of camping doesn’t exactly mirror your own family camping experiences, you’re not alone. My first few excursions into the great outdoors with my kids involved more work than play, more chaos than relaxation, and far more dirt (on everything) than I bargained for.

In the years since, I’ve learned some camping hacks that have turned my camping trips into the postcard version.

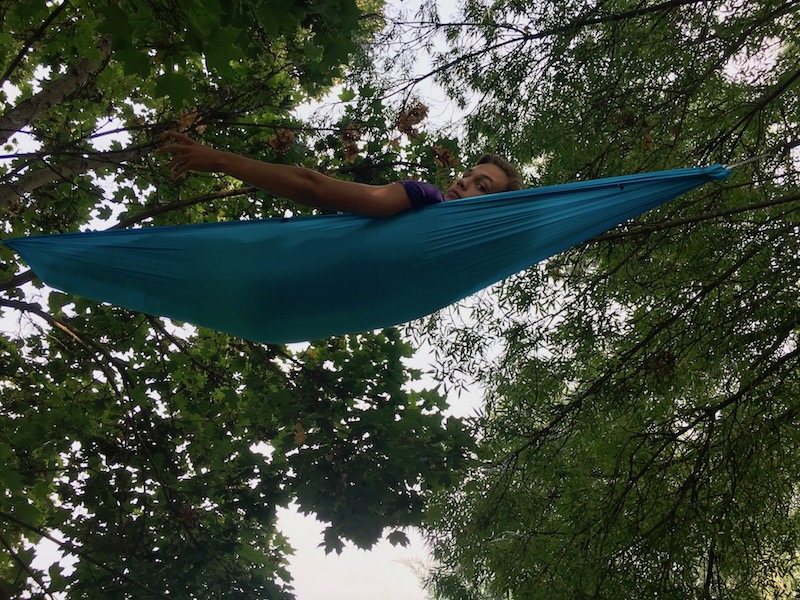
Want to ensure that your next camping trip is relaxing, stress-free, and focused on the fun, not the chores, in the outdoors? The following camping tips will ensure more time in the hammock and less time over a camp stove.

20 Camping Hacks to Make Your Next Family Vacation Better

1. Use Dryer Lint as a Fire Starter

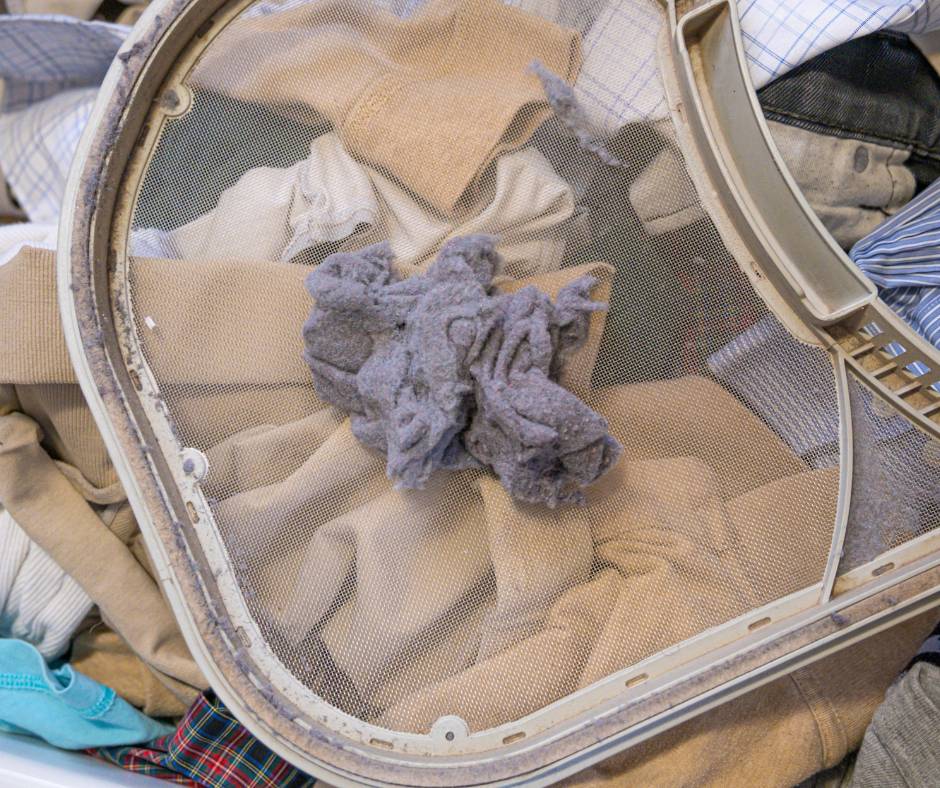
Why buy fire starter or chemical-based gel? Use dryer lint as your fire-starter: simply save lint in cardboard egg carton pockets, pour candle wax over each pod, then bring along to start your fire.

Use can also use cotton pads soaked in melted wax or coated in petroleum jelly as fire starters. They ignite easily and will help you get your campfire going.

Here are some of our favorite RV rental tips.

2. Re-Purpose Your Shower Tote

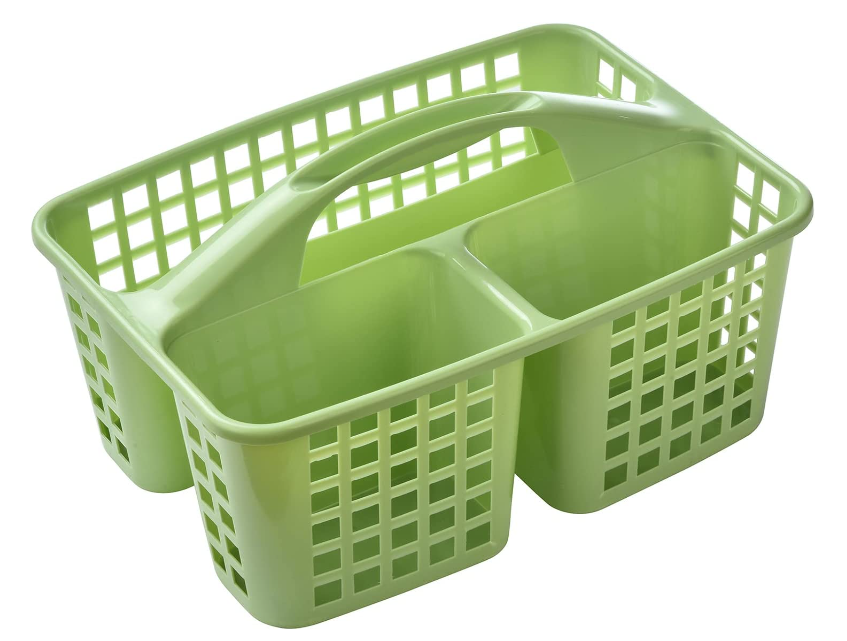
Bring a cheap shower tote with you when you camp. You can use it to tote your toiletries to the bathroom but you can also use it to store camp kitchen supplies, such as spices or grilling tools. You can typically find these handy-dandy items at dollar stores, making them a very cheap investment for a little organization.

3. Keep a Shoe Organizer Hanging with Essentials in Your Tent

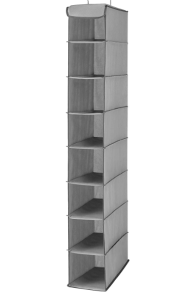
Shoe organizers also act as a great way to organize toiletries or any other small items you want easy access to. You can even hang them inside of your tent! It is like having your own little shelving unit while you camp.

We have found shoe organizer for storage to be good for when we van camp. Plus, they pack flat and take up almost no space when you pack. This one is from Amazon, but Home Goods sometimes has these as well for a bargain.

4. Cleverly Store Your Spices

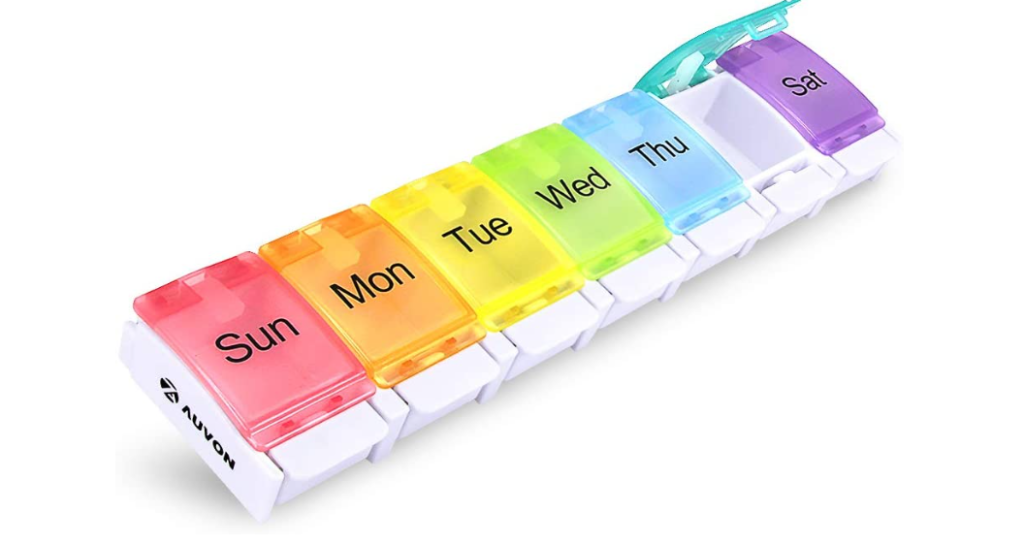
Those days of the week pill organizers that you use to store you meds have more than one use- they are also a great option for spices! Pack all your favorite spices into one convenient carrier and skip the bulk of trying to bring all those bottles from home. You can find these at a dollar store as well.

5. Freeze Water Bottles

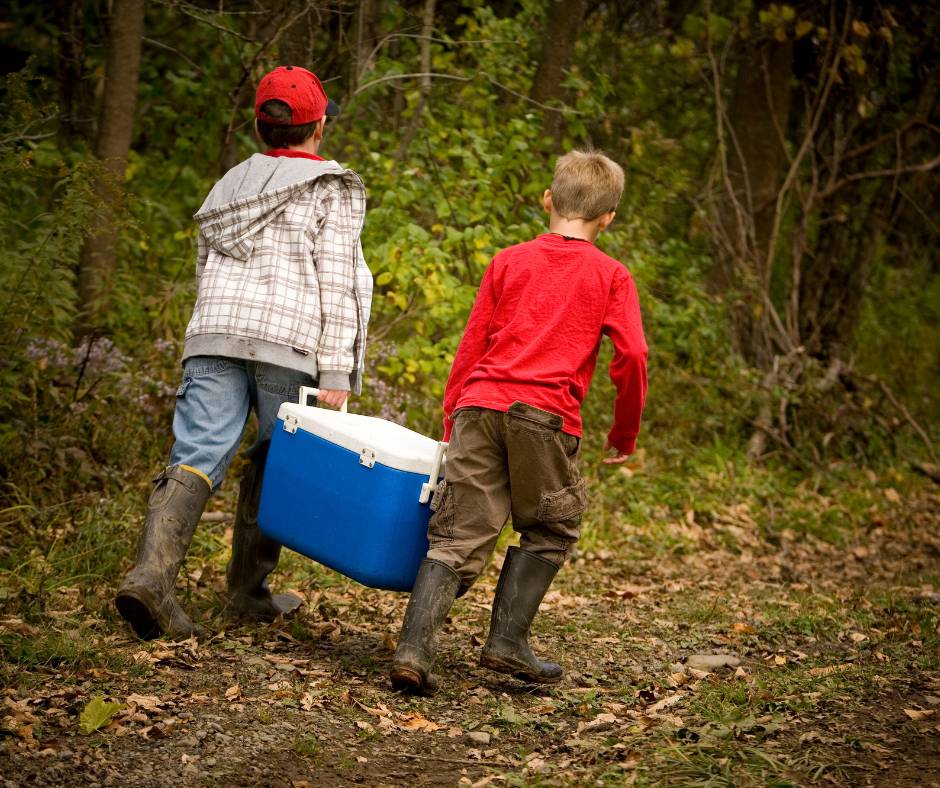
Instead of hauling bags of ice (and dealing with the mess), freeze plastic water bottles and let them slowly melt, first cooling your food, then ensuring hydration.

Simplification is the key to creating a relaxed camping atmosphere. Reduce clutter around the campsite and shorten your packing list by bringing a few ordinary objects that can double as useful camping tools.

If your family prefers to stick to reusable water bottles, buy blocks of ice instead of just cubes. Blocks take longer to melt. Another great option is to buy jugs of water, freeze them for your cooler, and then use that water in your refillable bottles as it melts.

6. Skip the Bulky Lantern

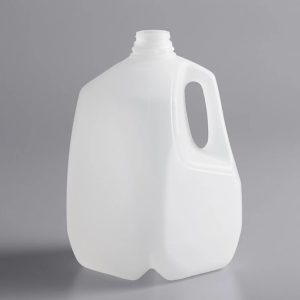
Skip the bulky camping lantern: instead, simply wrap a standard headlamp around a clear plastic water jug. It will light up the entire picnic area for games of cards after dark. You can also use a flashlight that is turned on with a milk or water jug placed on top of it.

7. Let Your Sleeping Pad Play Double Duty

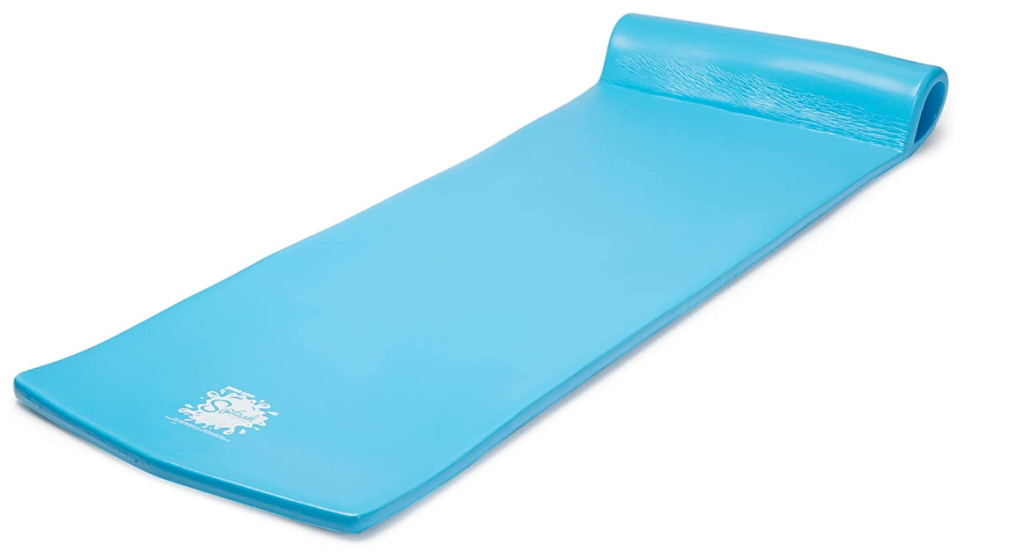
Why bring sleeping pads and water floats? Sleep on plastic blow-up air mattresses or foam pool floats that can go straight from the tent to the lake. Float on them during the day (or take a nap!), then return them to the campsite each night.

8. Make Foil Packet Dinners

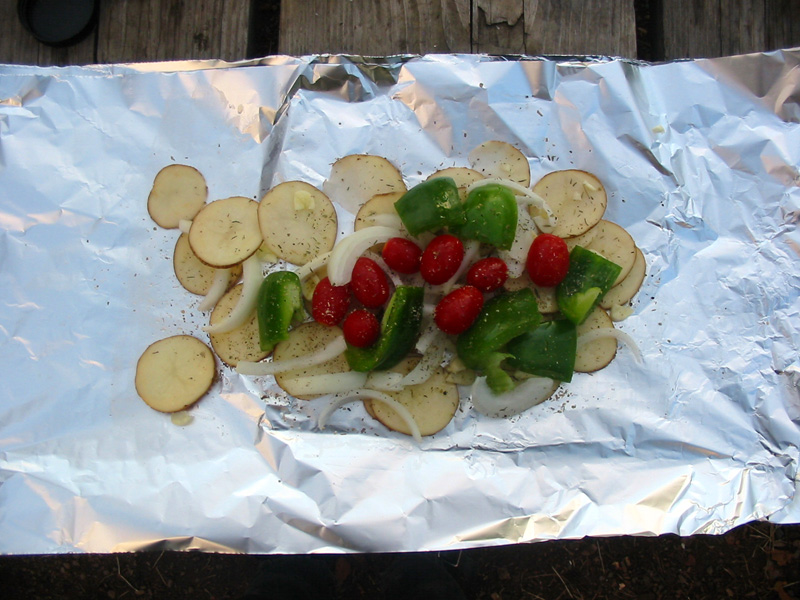
Cooking should be easy and mess free when camping. Create pockets using heavy duty aluminum foil and fill with sliced potatoes, zucchini, onions, bell pepper, pre-cooked sausage, and spices, and then let them cook in the coals.

Each pocket is customizable and fun to eat! When you are finished you can easily can ball them up and toss them.

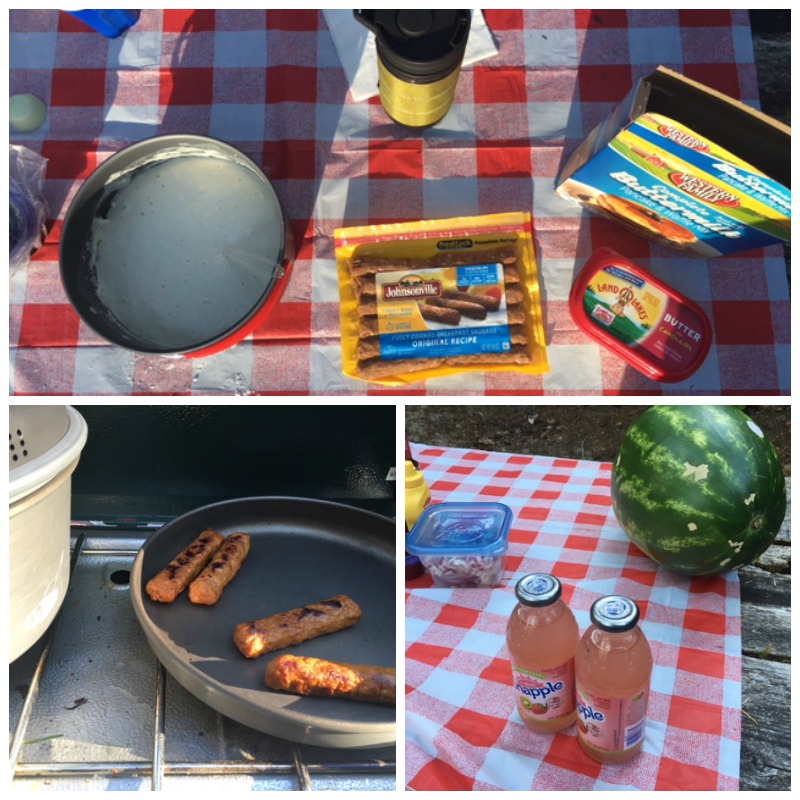
9. Make My Family’s Favorite Lazy Camp Meal

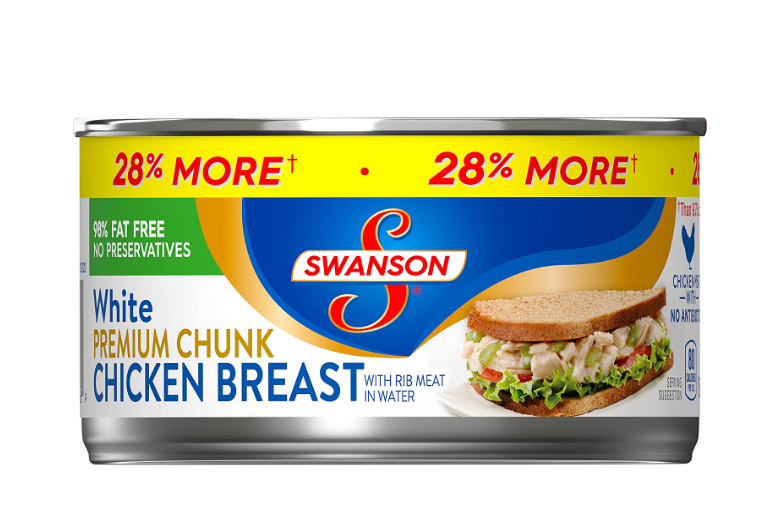
I learned this trick when on a rafting trip with OARS. Simply grab a couple cans of canned, cooked chicken and mix it into a pre-made bag of Caesar salad that you can pick up at the grocery store.

We find this to be a great option when we have spent all day exploring and don’t want to bother with the camp stove or a fire and best of all, everyone loves it! If you want to get fancy, throw some cherry tomatoes into the mix.

10. Pack Milk Substitutes or Ultra-Pasteurized Milk to Save Cooler Space

Shelf Stable Milk

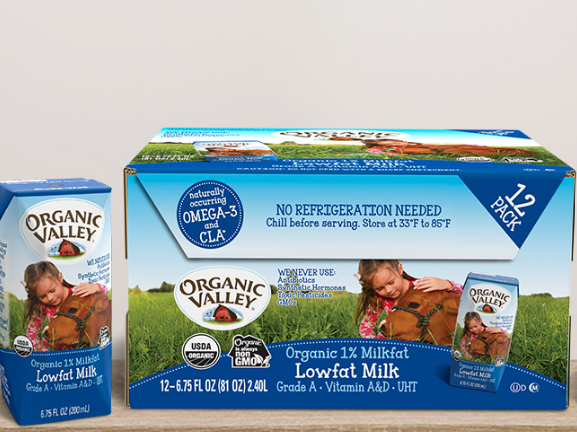
Many milk substitutes like soy, almond, and rice milk don’t have to be refrigerated. They also can come in fun flavors which appeal to kids. If your kids are sticklers for moo juice, Organic Valley sells a shelf stable milk that comes in individual servings which are great for travel.

11. Use a Shower Cap to Cover Dirty Shoes

Shower Cap

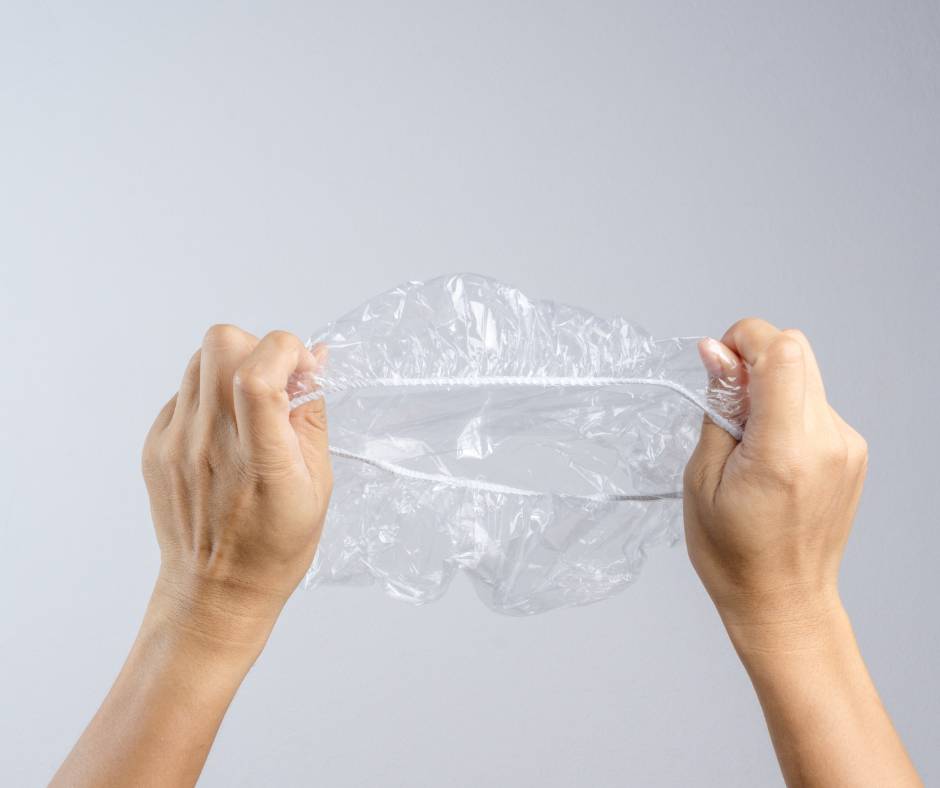
Dirty shoes can be a big problem while camping. Before packing your shoes, place a shower cap over them. Then, when you get back to camp after a day of exploring, use the shower cap to cover the shoe soles to keep the dirt and mud contained.

This will also keep your clothing from getting covered in dirt when you repack your shoes as well as keep your car cleaner if you come back and change your shoes after a muddy hike.

Shower caps can easily be picked up at a dollar store. We find these to work better than shoe covers because they stretch more and can handle my family’s large shoe sizes.

12. Make a Camp Pillow Using Your Clothes

Pillows take up a lot of room in the car and we have had different members of our family forget theirs on more than one occassion. Fear not! Take the bag your sleeping bag is stored in and fill it with clothes. Instant pillow!

13. Bring a Welcome Mat

Welcome mat

Pack a small rug or welcome mat from the dollar store and keep it outside your tent or van entrance. It helps prevent dirt and debris from being tracked into your sleeping area.

14. Make Single-Use Soap Leaves

Single use soap leaves are a great camping hack

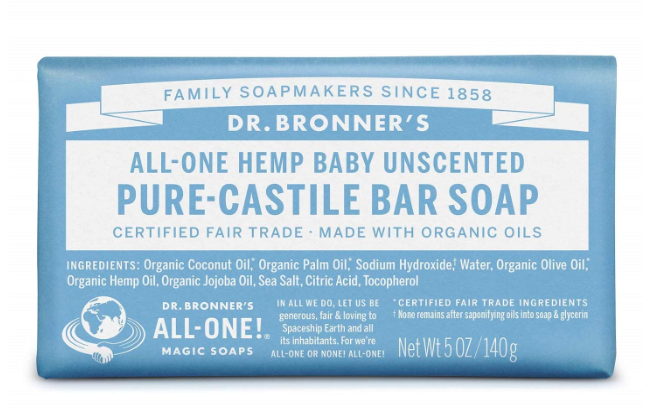
Use a vegetable peeler to shave small soap flakes off a bar of soap. Collect the flakes in a small container or plastic bag. Then you can use the leaves for handwashing or dishwashing. Dr. Bronner’s makes a soap that is good for dishes and heands and is environmentally friendly.

15. Create a Portable Handwashing Station

Collapsible water jug

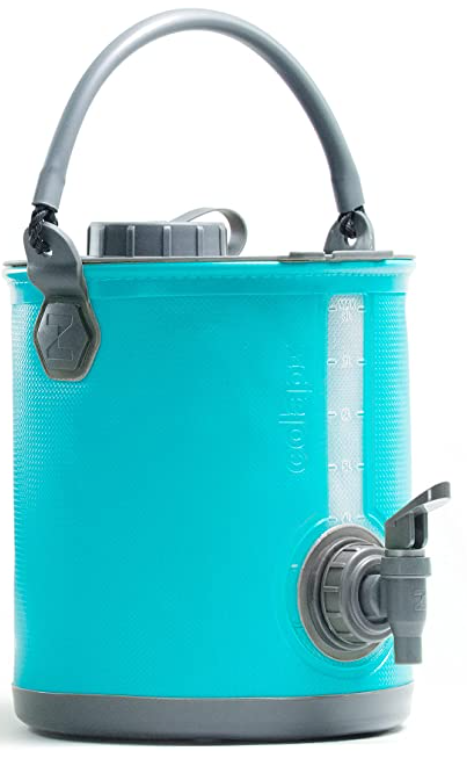
Hang a water jug with a spigot from a tree and tape a bag of soap leave to it. Drape a dish towel over the back of the jug. This allows you to wash your hands right at camp.

If there are no trees nearby, the edge of a picnic table can work. You can also purchase this collapsible, refillable water jug with a spout that is super duper cool.

16. Always Bring Ziploc Bags

Ziploc Bags

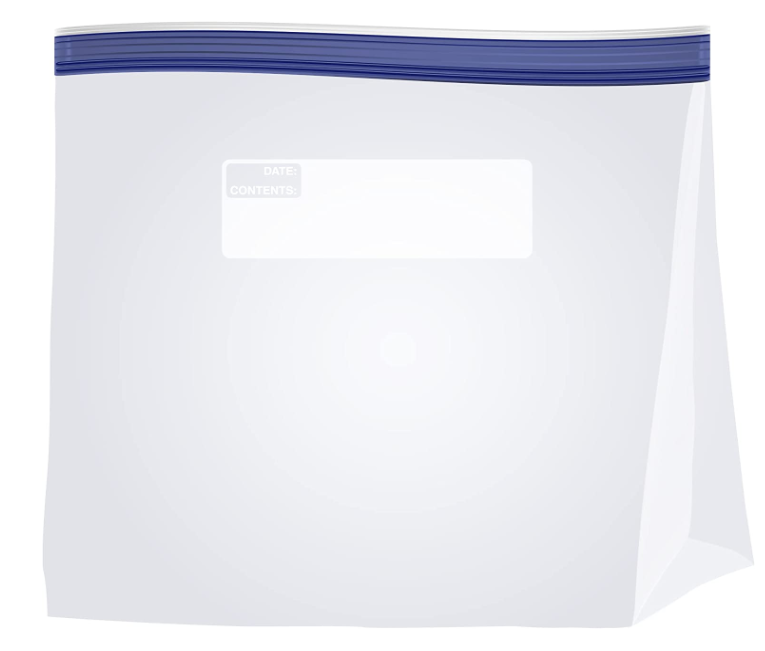
I always fill a gallon-sized bag with more gallon, quart, and sandwich-sized bags when I travel. You never know what you might need them for- snacks to take on a hike, wet clothes, storage for potty accidents you can’t clean right away, leftovers, and so much more. Plus, they pack flat and take up hardly any space.

17. Store Eggs in Ziploc Bags

cracked eggs

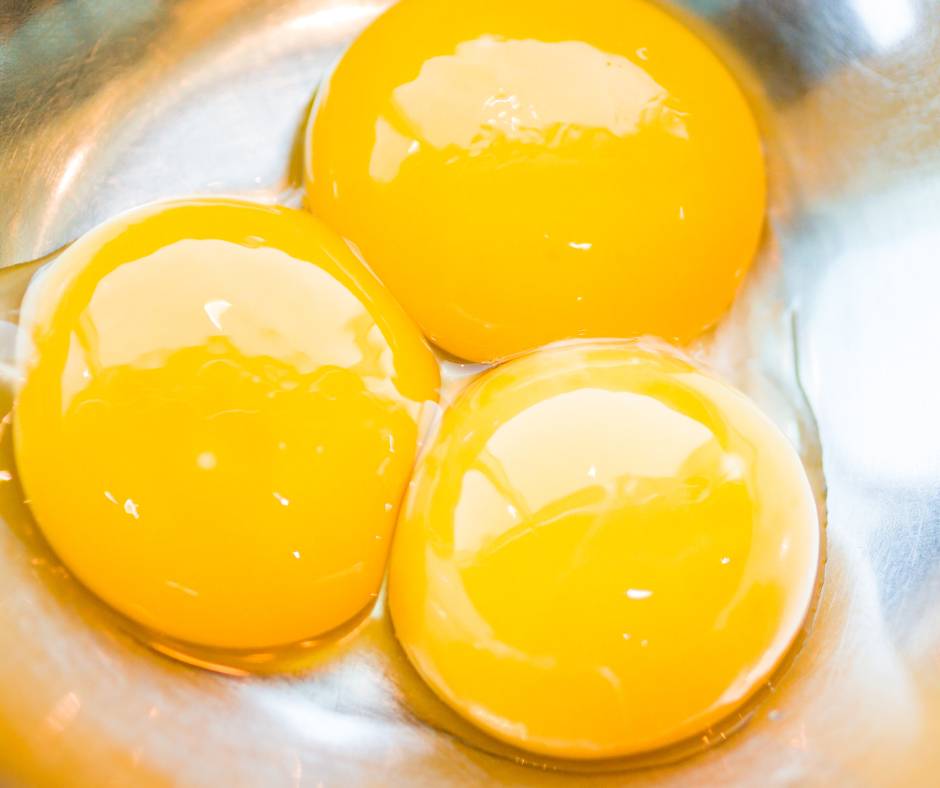
Speaking of Ziploc baggies, it is always a good idea to pre-crack your eggs and put the proper amount in a plastic bag for each meal you will be using them for on your trip. Then you will have that egg carton available for your fire starters (see #1)!

18. Use Your RX Bottles to Keep Matches Dry

rx bottle

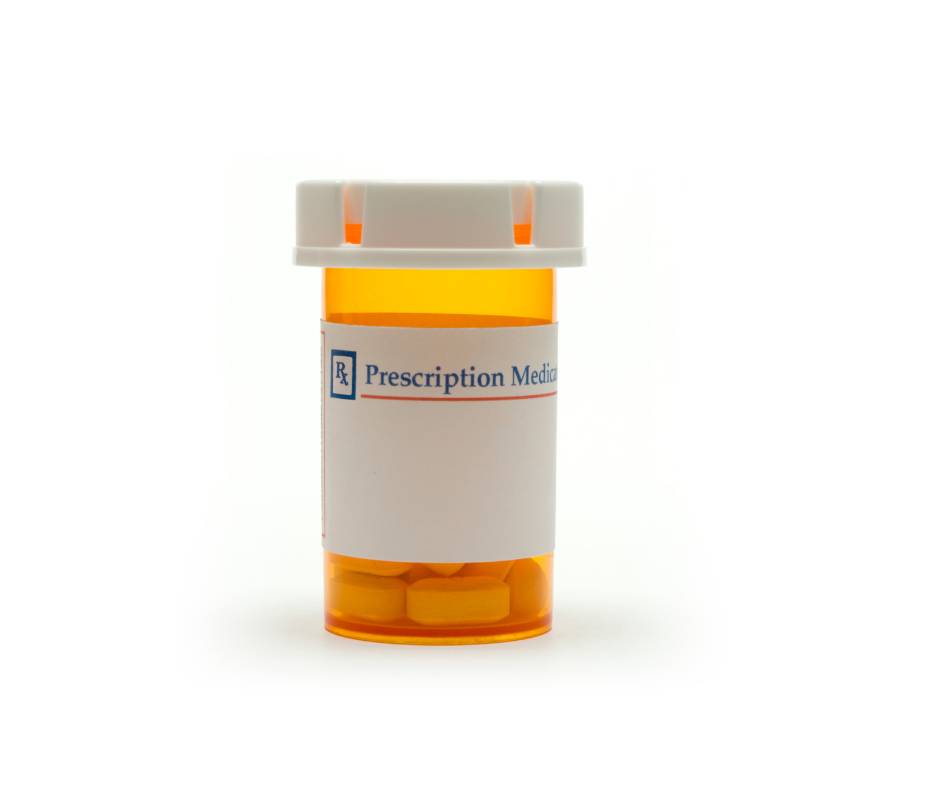
I always love to reduce my trash and repurpose things. Plastic prescription bottles are water tight and the perfect thing to use to store matches.

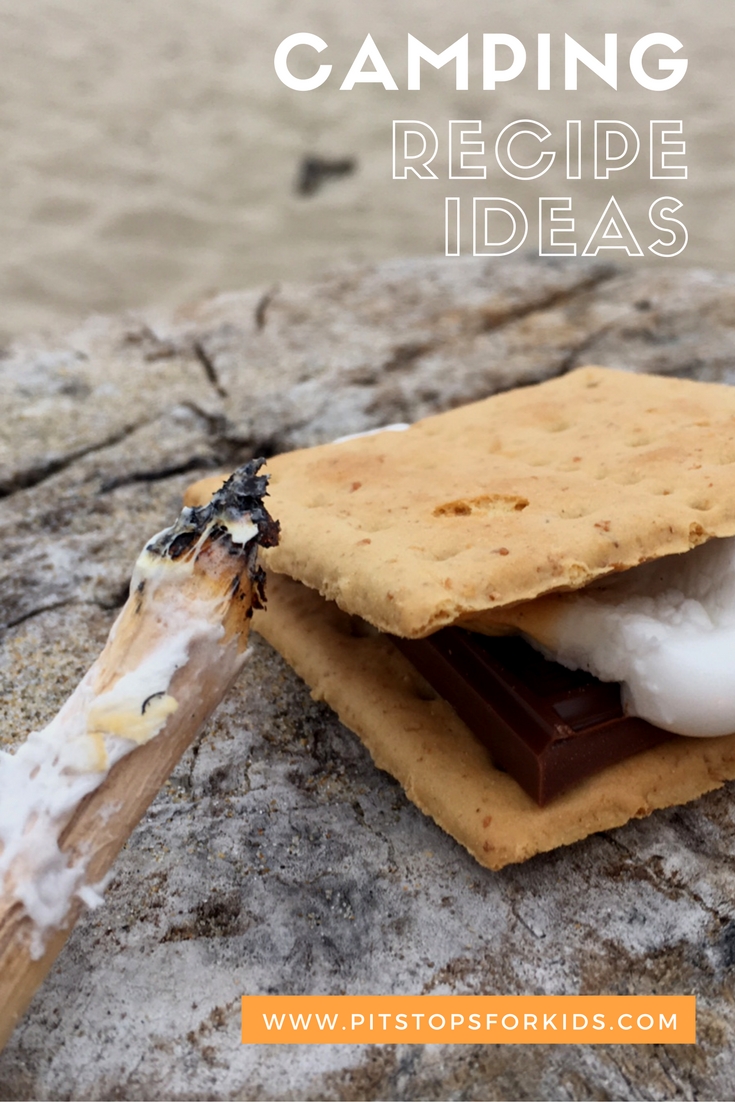
Wet matches make it really hard to start a campfire and enjoy those S’mores! Be sure to throw a small piece of sandpaper in there to use to strike the matches against and light them.

19. Pack a Collapsible Bucket

Collapsible Bucket

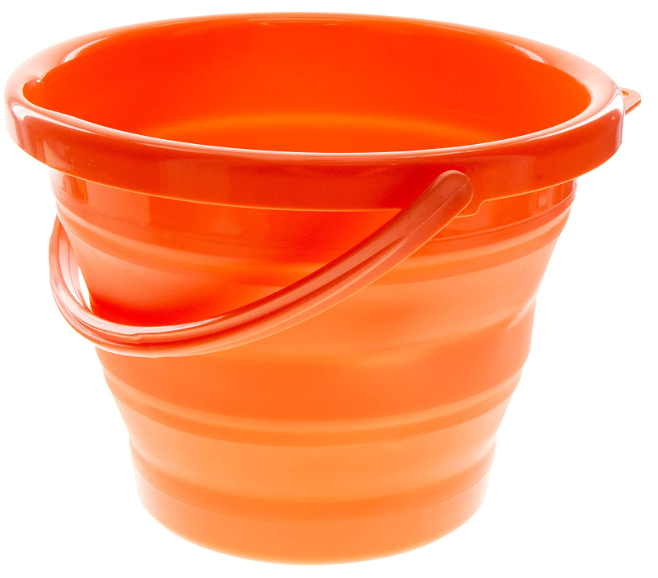
Why didn’t I think to invent a collapsible bucket? They have tons of uses and are so easy to store! Use it as a wash basin for dishes, ice bucket for drinks, bucket for collecting kindling, or simply for the kiddos to play with at the beach.

20. Take Your Campfire to the Nest Level with Mystical Fire

Mystical Fire

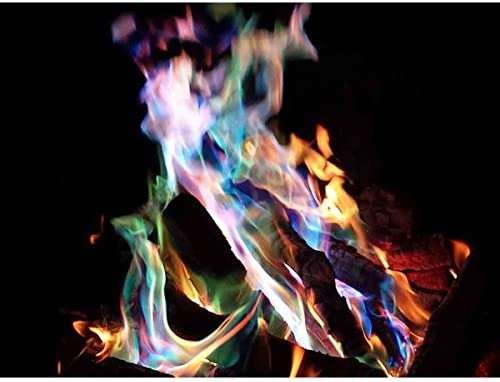
I’m not gonna lie, my neighbors and I are kind of obsessed with Mystical Fire. It was a discovery we made during our bi-weekly social distance cul-de-sac fire pits that we still can’t get enough. Just throw a packet or two into your campfire (after you are done cooking) and prepare to be dazzled.

Ready to go camping? Subscribe to our Pit Stops for Kids seasonal newsletter, and get an exclusive camping gear list, free! Click here!


Source: Fix.com

Intrigued? Read more of our camping hacks on fix.com.

Subscribe to our Pit Stops for Kids seasonal newsletter, and get an exclusive travel ‘cheat sheet’, free! Click here!

Must have van life camping gear

We have been camping in a 1984 Westfalia camper van, and it is epic! That said, space is at a premium in a Westy, and older camper vans, while charming and Instagram-worthy, lack some of the creature comforts of bigger RVs. If you are living the van life, tent camping, or camping in a smaller van, pop-up trailer, or camper, the following must-have camping gear is, well, MUST HAVE.

Must have van life camping gear you need for this season!

Must have van life camping gear

Tough duffels for organization:

We love our new Patagonia Black Hole duffel, made of water-resistant 100 percent recycled material. They range from 40-100 liters, with or without wheels. For van life, we recommend wheel-less, because these duffels are easy to stack on top of one another, toss around, and set in the dirt. We use one for all our bedding in our van, which keeps us organized and keeps our pillows and blankets clean.

Must have van life camping gear

We also like our Big Agnes Big Joe, which comes in 45-110 liter sizing. This one stores our dog gear, their bedding, and their food.

Pick up the Black Hole for under $230 on Amazon.

Comfy bedding for plenty of zzzz’s:

Our Sierra Designs’ Frontcountry Duo bed is amazing. If you’re camping as a couple, this sleeping bag feels more like bedding, with a zipperless design and toe holes so you don’t overheat. It comes in a single option as well, and a backcountry version that’s rated to a lower temperature. We lay our Frontcountry Duo out along our bottom floor bed, which we convert from our passenger bench seat at night.

Pair the Frontcountry Duo with a Thermarest Vela Double Quilt on chilly nights. This zipperless sleeping bag/quilt stuffs down small when you don’t need it, repels dog hair beautifully, and is rated to 32 degrees.

Chairs that invite lingering:

One nice thing about van life is that you can bring along extra weight, since you won’t be carrying it far. We like to relax by the fire in style with our GCI Outdoor Pod Rocker chairs. We’ve set these chairs in creeks, on the edges of lakes in the sand, by the fire pit, on lawns in parks, and everywhere in-between. They’re heavy, but they pack down small, and they are rocking chairs!  

Must have van life camping gear

GCI’s Spring-Action Rocking Technology allows for smooth rocking while you enjoy your time in the outdoors. There’s even a cup holder and a cell phone pocket.

Power that runs on solar:

If you plan to spend time off-the-grid with your camper van, you’ll want on-the-go power at your fingertips. We have the Jackery Portable Power Station 240, which we can pair with our Goal Zero solar panel to provide power for our camper lights, our phones, our laptops if we bring them, our InReach, and our music. The price of the Jackery depends on the power level you opt for, but can start as low as $99 and go into the thousands. Pick something that meets your needs in the outdoors with a little bit of wiggle room, just in case.

must have van life camping gear

Bear in mind that you don’t HAVE to power the Jackery with a solar panel. You can charge it using a wall outlet before you leave home, as well. We do both!

A lantern that turns your van into a party (or a romantic evening):

BioLite AlpenGlow 250 is an LED camping lantern with so many light and color modes, it takes a bit of a tutorial to take advantage of them all! But once you know, you know, and you can toggle between a very bright LED light, a dimmed yellow light version, solid color lights, half a light (to save power) and a full-on color dance party. You get a USB cord included (we charge this lantern with our Jackery power bank) and the 250 lumen version is small enough to fit in our glove box (there’s also a 500 lumen version).

BioLite Alpen Glow

More must have van life camping gear:

An extra cargo box to bring all your toys:

We love our Thule Transporter Combi cargo box, which is hitch-mounted. Read our full review! We love the design because we don’t have to worry about loading and unloading a rooftop cargo box on our van, and we don’t have to worry about the extra weight on our pop-top. The Transporter Combi fits our grill, our charcoal, our portable toilet, our recycling, and more, so we don’t have to carry any of this inside the van when we travel.

Pillows that can take a beating:

Our Avocado mini green pillow travels in our van, serving many purposes. It’s great to prop myself up to read or work on my laptop on those travels when work comes along for the ride, and it’s small enough to not take up precious storage space. The size is also perfect for small kids and toddlers!

A high-quality auto tool kit:

We hope we’ll never need to use our car and van tool kit (or at least not often!) but having it brings peace of mind.

Reusable propane:

This is a game-changer. The Ignik Gas Growler allows us to refill with propane in a portable form, which saves tons of those green gas canisters from the landfill. Plus, the convenience and cost savings are significant! We use the gas growler to power our stove, but you can use it for anything you’d need propane for.

A truly long-lasting cooler (or two):

Yes, it’s worth it to buy a Yeti. Or a Pelican. Or any double-walled, highly insulated, hard-sided cooler. Our ice lasts for days, our drinks stay cold, and we aren’t afraid to bring food ingredients like raw meat, fresh veggies, and dairy, even though we don’t have any electric refrigeration. Yes, the hype is worth the money. We have a Yeti Tundra 45.

A hot shower (or cooling spray):

Our Helio Pressure Shower from Nemo Equipment doesn’t just offer the welcome chance of a warm shower (thanks to its solar heating capability). Because it’s pressurized, you get a strong sprayer that’s great for getting sand off your feet, hosing off muddy dogs, and even doing the dishes. It’s not a gravity-based solar shower, so you don’t need to find a tree to hang it from. Any sunny patch in your campsite will do!

Safe, portable water:

A Lifesaver Jerrycan will set you back, but you get peace of mind that extends far beyond camping season. Thanks to built-in filters, a Lifesaver is a portable water purifier capable of filtering 10,000 litres/2,650 US gallons of clean drinking water, removing viruses, bacteria, cysts and parasites. Its great for camping, for off-grid living, and for emergencies. We have ours always filled with water and stored in the garage in case of evacuation or loss of power and water.

Additional resources:

RV vacation tips for the summer of 2021

Pit Stops for Kids is, at its roots, a resource for families who love to hit the road. We’ve evolved over the last decade to include destinations and vacations across the world, but during these uncertain times, we invite you to join us in returning to what we know best! For the summer of 2020, a road trip or camping trip might be the best vacation for your family. And we’re here to help you plan it safely.

rv-road-trip-tips

As states slowly open up again to domestic travel, the challenge remains for families to be able to explore while social distancing. One ideal way to do this is with a camper van or RV vacation. Why? You and your family can social distance using your own:

  • dining area
  • bathrooms
  • sleeping quarters

You only patronize local restaurants and hotels when and where you feel it’s safe to do so. Get our RV camping tips here.

Tips for choosing where to go on a road trip or RV vacation:

Even if you can ensure self-containment within your RV or camper van for meals, bathrooms, and sleeping, you’ll want to vacation, right? This means picking a destination that’s open for tourism. Check national state park closure lists, but in the early planning stage, don’t be afraid to make campground reservations. Recreation.gov will cancel and refund you in the event that the campground is not yet open in time for your trip.

If you don’t want to camp at a designated campground, consider dispersed camping. Any BLM and national forest service land is free to camp on; pick up a local BLM map and call the ranger station for ideas. Remember that you’ll be off-the-grid while dispersed camping, so you’ll need to be self-reliant for power and heat, and will need to follow Leave No Trace principles.

A third option is HipCamp, which pairs RV campers and road trippers with private land available for camping. It’s like AirbnB for camping, and is a great way to socially distance while enjoying a new location. Check out our dispersed camping and HipCamp tips.

Once you have campground reservations or have decided on your dispersed camping option, do some research on your intended destination in general: are locals welcoming tourism to the area? Many are, but some regions are wary. Will local restaurants be open for take-out or delivery? Are local attractions, such as museums or parks, open? If not, think of alternative plans: are hiking trails in the area? Can you access greenways or bike paths?

We have successfully enjoyed a private campground experience, a HipCamp experience, and a Rec.gov campground experience since this spring, all while maintaining distance from others and utilizing our own kitchen areas, sleeping areas, and bathrooms in our camper van.

But what if you don’t own an RV or camper van?

You can rent one! RVshare is the first and largest peer-to-peer RV rental marketplace. Families can rent anything from a travel trailer to a luxury motorhome (and if you own an RV, RVShare is a great way to make some vacation cash while you’re staying at home). RVShare offers:

  • 100,000 listings across the US 
  • a worry-free rental guarantee
  • Rentals available in all 50 states 
  • A safe and secure booking/payment platform 
  • Instant bookable 
  • 24/7 Emergency roadside assistance on every booking            
  • Pet-friendly options                                               
  • Delivery and stationary options                                                            
  • Comprehensive Nationwide Protection: RVshare Rental Insurance covers both domestic  and international renters and provides collision and comprehensive coverage

The average cost is $150/night and anyone with a valid driver’s license can drive. All drivers must be at least 25 years of age. By choosing an RV vacation this summer, you’ll save yourself the heartache of canceled airfare and have more control over your family trip during this time of uncertainty. Enjoy the outdoors!

RV vacation tips

Disclaimer: This post was sponsored by RVShare. All opinions remain my own.

Tips for renting an RV

2021 will be the year of camping and outdoor travel! One of the safest ways to see the country this year is by renting an RV, where families can have their own bathroom, sleeping quarters, and kitchens while easily socially distancing from other travelers.

Tips for renting an RV on your next family vacation. Safely travel and social distance!

Ready to rent an RV?

We rented an RV from CruiseAmerica, which has rental locations across the US. Our destination was Zion National Park, so we flew in Las Vegas, renting an RV from the location in Henderson, Nevada. We are RV novices, but we found the experience easy and not intimidating!

Tips for renting an RV this spring or summer:

Plan a route that allows you to return the RV to the same rental center. Just like if you rented a car, you significantly reduce the cost of your RV rental if you’re returning it to the same location from which you picked it up.

Plan your transportation to the RV rental center. Cruise America does not allow for any overnight parking, so if you’re driving to your RV rental center, have a plan for where you’ll park your car while you’re on your RV trip. Take an Uber from the airport, or, if you’re lucky like we were, get local friends to pick you up!

Choose you RV size carefully. The bigger the RV, the more intimidating it is to drive! But you definitely need room for everyone to spread out. A 19-foot RV is perfect for a couple (you can either convert the dining room table to a bed or sleep in the berth above the cab), but for families with kids, you’ll want more sleeping space.

Double check the amenities offered at the campground. Does the campground offer full hook ups (water, electricity, and dumping)? Or, in our case at Watchman Campground in Zion National Park, only electricity? Your RV rental will come with a tank of water to be used for showering, hand washing, dishes, and flushing, but it’s not unlimited if you don’t have water hook ups. Get acquainted with the levels gauge in the RV so you can keep an eye on how much water you have left. If you need to refill your water tank, remember that you’ll also need to dump.

Allow yourself extra driving time. You’ll drive slower in an RV, and you’ll need to plan your stops carefully, avoiding narrow turnarounds and difficult-to-navigate parking lots. Look for rest stops and truck stops!

Bring as much gear from home as possible. You can rent sleep and kitchen kits from Cruise America, but if you have camping gear at home, we recommend packing it. It will be better quality and you’ll already be familiar with your stuff. We managed to fit all our camping gear (including small folding chairs, kitchen gear, sleeping bags, and pillows) into two checked bags.

Remember that you fly to your destination, you won’t have ALL your camping gear. For us, this meant sacrificing some of the outdoor camping gear we like to bring on camping trips, like extra lanterns and lights, bigger camp chairs, and picnic supplies.

If you rent the smaller RV size (19-foot), remember you will not have an oven. You will have a microwave and a stove top only to cook your food. We simply planned our menu around this.

Use campground facilities to save water and dump less. If your campground has clean bathrooms and showers, use these facilities to save water in your RV. After all, you already paid for them!

Plan on much higher gasoline costs. Our RV cost $100 to fill up in Utah and Arizona in spring of 2021.

Renting an RV can cost a fraction of the price of hotel rooms, and allows the family to safely travel during the pandemic. If you rent an RV, have a great time!

Camping recipe ideas and tips for fall

We enjoyed one of our last summer weekends on the Oregon Coast at Eel Creek Campground. It was cool and foggy, which meant fall camping conditions for us! We came to this part of the Oregon dunes to go sand boarding with a big group of tweens and teens, so we needed to really think through our meal lists. For all your year-round camping adventures, here are a few camping recipe ideas and tips from one camping family to another:

camping-recipe-ideas

Camping meal tips:

  • Pack separate coolers: You don’t want your main meal ingredients, like frozen meat, sliced veggies, and staples like milk or eggs to get warm, so place these items in a separate cooler from the one you use for ice and drinks. That way, it’s not opened and closed continuously throughout the day.
  • Freeze plastic milk jugs instead of bringing blocks of ice: This way, as the ice melts, you have potable drinking water to use, instead of a soggy, leaking cooler. Bonus tip: wrap your headlamp around the milk jug (inwardly) in the evenings for a lantern that will glow brightly! 
  • Pre-sliced or cut meat into the portions needed for your recipes before you leave home, then freeze them in zip-lock bags. Your meat will gradually thaw, and you’ll save a lot of time and energy once at camp if you don’t have to portion the servings. Choose meats that can pull double duty: for example Johnsonville fully-cooked sausage patties can be used at breakfast, then again in dinner tin foil packets or soups.
  • Bring milk that doesn’t need refrigeration: Consider using powered milk or boxes of milk that don’t require staying cold, like almond milk.
  • Place all your cooking items into one plastic storage bin: mark it as your ‘kitchen’ bin and keep everything together. For organization at camp, use a hanging shoe organizer to stow spices, utensils, and knives you need to keep out of kids’ reach.
  • Be sure to safely store food at camp: Use a bear locker or bin if provided by the campground, or hang food from a tree in a sleeping bag stuff sack if you’re in bear country. If not, store food in a locked car at night to prevent smaller critters from snacking.
  • Have a separate lunch bag that kids can dig into on their own. Keeping lunch and snack items apart from your dinner ingredients ensures foods don’t get eaten up early when they’re supposed to be part of recipes! Consider bulk foods for snacks to cut down on packaging and trash, such as trail mix, dried fruit, and nuts from bulk bins.

Fall camping recipe ideas:

Autumn is a great time to camp…the crowds have left your favorite campgrounds, and the weather stays nice in most areas long after Labor Day. Fall is the time for savory, warm camping meals between traditional BBQing sessions. Here are a few fall camping recipe ideas:

camping-recipes

  • Egg scramble: Start with a layer of hash browns on your griddle (bring frozen hash brown patties for ease), then scramble with eggs, sausage, cheese, and any fresh veggies you’ve brought along. Serve on tortillas for breakfast burritos that reduce the need for plates…and dish duty.
  • Dinner tin foil packets: Anything goes in these fun dinner packets! Start with a square of tin foil for each person. Create a buffet of chopped veggies and sliced meats (pre-cooked is best for fast cook times), plus diced potato and any spices you want to add. Each person creates a customized packet, then places it over the grill (allow coals to get hot first…not over a new fire). Cook until potatoes are soft…this may require some checking by parents.
  • Potato soup or chili: Use the burner on your camp stove to make a big batch of easy-to-make potato soup or chili (or one of each!). We like to use soup starters that come in powder mixes when we camp, then we add cooked meat or veggies to the mix ourselves. Sausage, diced chicken, fresh corn, or red bell pepper work great in the soup, and any meat or beans can be added to chili mixes. When the weather is turning cool, it’s great to have soup on the camp stove! Bring a pan of cornbread from home to serve alongside!
  • Hot dogs over the fire…with extras: Have kids gather sticks and roast hot dogs over the fire, then add some extras. Remember that chili you served the night before? Reserve some for your hot dog night! Add diced onion (get it pre-packaged, or dice at home), avocado, shredded cheese, or roasted veggies to the mix.

Do you have a top fall camping recipe idea? A family favorite? Share in the comments! Note: comments submitted may be displayed on other websites owned by the sponsoring brand.

This is a sponsored conversation written by me on behalf of Johnsonville. The opinions and text are all mine.

var ts=document.getElementById(‘ti-pixel-tracker’); var axel = Math.random() + “”; var num = axel * 1000000000000000000; var ti=document.createElement(“img”); ti.style.display=”none”; ti.src=”https://tracking.tapinfluence.com/trk/Zl0qD/FLIrV/p.png?p=NaKx5″ + String.fromCharCode(38) + “i=xgp6m” + String.fromCharCode(38) + “ord=”+ num + String.fromCharCode(38) + “s=” + encodeURIComponent(document.referrer); ts.parentNode.replaceChild(ti,ts); new TAP.CogFrame(‘/v1/cogs/7e0c5b04-4507-11e6-89bd-22000a66c666/comments’).drop({“program_id”:”7e08c890-4507-11e6-89bd-22000a66c666″,”post_id”:”5acddd30-6577-11e6-b161-22000a7d00a4″,”host”:”api.tapinfluence.com”,”apiHost”:”api.tapinfluence.com”,”sort_order”:”desc”,”limit”:”20″,”offset”:”0″,”sort_by”:”created_at”,”protocol”:”https://”});

How to pack for a camping trip and organize your campsite

Camping with the family is supposed to be relaxing, but it can feel stressful if you don’t know how to pack for a camping trip, and set up your campsite efficiently. After all, no one wants to spend all their time unpacking gear, looking for things, and hauling stuff around their campsite! Read on to learn how to efficiently pack and set up all your gear!

OARS

How to Pack for a Camping Trip: Easy Set Up at the Campground

Start your packing process with stackable rubber storage totes. You’ll need at least three (one for each camping “section” of your campsite, including the kitchen, sleeping, and living areas). Larger families or those with extensive gear will probably need more than one tote for each section. Once you arrive at your campsite, simply set each tote in the designated area you’ll need it in, such as the area around your picnic table for the kitchen tote, your tent area for your sleeping tote, and near your campfire pit for your living area tote. Color code your totes to remember where each one belongs.

Try this kitchen packing hack: Store your kitchen tools and utensils in a toiletry bag or other small bag to keep them organized and clean between uses at a dusty campground. You can hang them from a tree branch for easy access when you’re at your site.

In addition to your three “main section” totes, assign a smaller tote to each family member. This tote will hold that person’s clothing and personal items. Using totes for this purpose, instead of duffel bags or suitcases, saves space in your car, trailer, or RV. This especially helps save up room in an RV for important items like an extra RV battery. You can read about which RV battery to buy here https://www.stayontrails.com/best-rv-battery.

Place items you’ll need at the ready in a mesh laundry sack (which can be re-purposed later for dirty clothes). These items may include swimsuits and towels you’ll want as soon as you arrive at the campground or jackets and boots if you’re camping in damp areas or in the off-season.

How to Find a Good Campsite and Set Up Efficiently

If you can reserve your campsite ahead of time, do so online as early as possible. Look at the campground map and note campsites that back up to the wilderness instead of other sites. In addition, look at the bathroom and shower locations (you may want to be close to one or you may want to be farther away from foot traffic). If you are camping at a campground that does not take reservations, arrive at the campground as early in the day as possible. When you arrive, look for a campsite that backs up to the forest or scenery to minimize noise from any neighbors.

Find a campsite with equal parts shade and sun to maximize your exposure and enjoy warmth in the mornings and cooler temperatures in the afternoon. Once you’ve selected a site, set up your sleeping area in the shade (so your tents don’t heat up during the day) on flat ground away from the fire ring and kitchen area.

Set up your kitchen adjacent to the fire ring and picnic table. You may want to consider setting up a screen dome or shade shelter over the table to reduce unwanted quality time with insects and mosquitos. Make sure you place your cooler in the shade.

camping-recipes

How to Have a Safe Campfire

First, always make sure the campground permits campfires. Campfire policies can change seasonally, and they may be prohibited during peak forest fire danger periods. If campfires are permitted, make sure to gather sticks and wood from the ground around your site, taking care not to break branches off living trees. Dead wood is drier and better for burning.

If you need to buy firewood, buy it at your campground or at a local store. This practice saves space in your vehicle for your other gear, and it is far better for the environment. When you bring wood from home, you can unknowingly bring unwanted, non-native insects or parasites along with it.

Start your campfire with kindling or small sticks from around the campsite, combined with some newspaper or store-bought fire starter.

Always let your campfire start to die out one hour before bedtime. This is a great time to light a camping lantern and play a few rounds of cards or a board game. Of course, you should always put your fire completely out before leaving your campsite (for the day or at the end of the trip). To extinguish your fire quickly, separate the burned coals with a stick. Once they’re not touching, they will become cool to the touch within 15-20 minutes on average. After spreading the coals, ensure that the fire is fully out by throwing buckets of water or sand or them.

Pin it for later!


Source: eReplacementParts.com

Family camping at new heights: Gear for elevated camping

Have you ever wanted to camp off the ground? Elevated camping is becoming more and more popular, because camping in tents and hammocks designed to be strung in trees allows families to camp on un-even terrain, away from pesky insects, and out of the elements. It’s also just super fun and cool. If you want to try elevated camping, here’s what you’ll need!

kammok

Kammok Wallaby paired with the Dragonfly net and Kuhli tarp

Gear for elevated camping:

Start with your hammock:

The first step to gear up for any elevated camping situation is to select your hammock. You don’t have to get fancy, but you will want to consider your various hammock options. Below, we’ve listed some of our favorites, and why we love them.

Grand Trunk: You can’t go wrong with a Grand Trunk hammock, in our opinion. We’ve tried many, from the lightweight single parachute nylon model for just $59 to the Skeeter Beeter Pro, which has integrated mosquito netting built in. You can get a double or single hammock in all kinds of fun colors and patterns at Grand Trunk.

Kammok: We love the Kammok Wallaby, which is just $65 and comes in multiple colors. Pair the Wallaby with Kammok’s Python Straps for $30 more, which make any hammock easier to suspend from just about anywhere. Either Kammok or Grand Trunk options would make for a great base hammock.

Sea to Summit: Sea to Summit makes an ultralight hammock that’s an absolute must if you’re purpose for elevated camping is to go light. It’s very thin, so you’d definitely need to pair it with a hammock pad (see below) to protect yourself from cold temperatures at night.

elevated-camping

Kammok Wallaby

Add your pad layer:

Klymit Hammock V pad: If you’re serious about sleeping above the ground, you’ll want the protection of a sleeping pad. Not only does the right pad help your hammock keep its shape (so you don’t roll up like a burrito) but it keeps you warm…without a pad, you’re exposed to the cold night air directly. Klymit makes a specialized hammock pad that’s shaped to fit. The Hammock V pad comes in an insulated version or non-insulated, and while it will set you back $169, we recommend the insulated if you’ll be doing a lot of camping.

If you use a regular sleeping pad instead, pick one that’s small and narrow to fit the hammock, and consider covering it with a specialized pad sheet, to reduce slippage. Klymit makes one of these too…the Quilted V Sheet will work, and it’s oh-so cozy!

Add your rain and bug protection:

Kammok Kuhli tarp or Grand Trunk Air Bivy: Both these items give solid protection from wind and rain, serving as a shelter/rainfly for your hammock. Of course, they don’t cover 100% of the space, so you’re still going to get wet if the rain comes in sideways. The Kuhli tarp and the Air Bivy are both extremely versatile and lightweight, making them a great addition to your camping gear whether you sleep elevated or not. We’ve used both for BBQs, car camping, and the like.

Sea to Summit Bug Net: For 13 more ounces, you can be protected from flying insects while sleeping in your hammock…worth it in my book! The Sea to Summit bug net works with all Sea to Summit hammocks. We haven’t tried it with other hammocks.

Grand Trunk Mozzy Net: The Mozzy Net is a good option because it’s versatile…it stands alone, so can be used with any hammock or even around a picnic table or kitchen area. The downside: it’s a bit clunky to set up; the multiple guy lines that make it adjustable to any situation also make it complicated to get the right shape until you’ve had practice.

amzn_assoc_placement = “adunit0”;
amzn_assoc_search_bar = “true”;
amzn_assoc_tracking_id = “pitstoforkid-20”;
amzn_assoc_ad_mode = “manual”;
amzn_assoc_ad_type = “smart”;
amzn_assoc_marketplace = “amazon”;
amzn_assoc_region = “US”;
amzn_assoc_title = “My Amazon Picks”;
amzn_assoc_linkid = “33b1ef183fd36a844f0ada42bfc9a3a3”;
amzn_assoc_asins = “B001AIHB76,B009YRUIC0,B06ZZ49PL4,B005TOR6RW”;

Add-on: Portable microscope

You’re up in the trees, so what can you see? When going camping with kids, it is always a good idea to pack some devices that can provide entertainment even though their primary purpose is educational. Such a device is a handheld microscope as it is an easy-to-use product that lets children explore the world around them, and even more, the world they can’t see with the naked eye. Usually, a handheld microscope connects to one’s smartphone, tablet, or laptop in order to provide magnified images of leaves, fruit, and a myriad of insects that one might discover at a campsite. This way, your trip with the kids can be both instructive and fun, as you’ll spend some time gathering items and bugs that you can look at in-depth.

Want to go big? Try a tent-hammock combo!

Kammok Sunda: If you want your hammock to actually be a tent, and vice versa, the Kammok Sunda is a two-person tent and hammock hybrid. It’s very pretty, but even better, it can convert to a stand-alone tent or a stand-alone hammock, depending your needs. This is a great feature, as there will be times you want to set up your tent-hammock in the air, but cannot find the suitable trees to do so. The Sunda is on pre-order right now, for $349.

tentsile

Tentsile Flite

Tentsile: We’re currently testing a Tentsile Connect, and have packed it a few miles into a lake in Northern California’s Trinity Alps. It’s heavy enough to relegate it to car camping and short backpacking trips, but oh-so-cool! It sets up with a ratcheting system for suspension that has a learning curve but is easy once you’ve tried it a few times. In our experience, a couple teenage boys armed only with the YouTube tutorial video were able to set it up in about 10 minutes on the first try. There are many sizes and styles of Tentsiles to choose from (some, but not all, get quite expensive).  Tentsile tents come with rainflies, which can be pegged on the ground, though the tents themselves are not meant to be on the ground. The two-person Tentsile we like best is $350.

tentsile connect

Tentsile Connect, set up in Trinity Alps CA

Note: the downside of elevated tents is their weight. Even hammocks can get heavy, once you add the rope you need, your tarp or cover, and a mosquito net. If you want to travel light, be sure to add up the weight of your elevated camping system before committing! 

Pin it for later!

elevated camping


SaveSave

SaveSave

SaveSave

SaveSave

SaveSave

Travel Gear We Use: The Seventy2 Survival System bug-out bag

You may not be a doomsday prepper or preparing for a zombie apocalypse (or maybe you are), but every family should have a car bug-out bag, ideally for each family member and certainly for road trips and emergencies.

emergency-bug-out-bag

Opt for the Seventy2 Survival System from Uncharted.

Preppers define bug-out bags as gear they can grab quickly in case of emergency, that’s ready to go when they are. The folks at Uncharted simplify this even further: their Seventy2 bag are designed with the premise that 95 percent of emergencies are rectified within 72 hours, so they make sure you have everything you might need for those crucial hours, nothing more, nothing less. The result? A streamlined system in an easy-to-carry, high-quality backpack that you can gift to family members or buy for yourself.

The ‘shell’ of the Seventy2 bag is a 48 liter backpack that’s waterproof and very clearly organized. This backpack alone is worthy of a review. It has pockets and features galore. Inside, clearly marked ‘survival pouches’ make it easy to find essentials, plus know what to do with them. The ‘tools’ pouch is thus labeled, for instance, with all the contents listed underneath, including paracord, shovel, axe, duct tape, knife, and fire starter. In the ‘warmth’ pouch is a tent, blanket, hat, gloves, and hand warmers. For a full list of everything in the Seventy2 bag, including USB chargers, radios, and more, check here. 

Can you put together your own survival go bag? Of course. Will you, to this extent? I can almost guarantee you won’t. At least, I won’t, which is why I gifted my college-aged son with a Seventy2 bag and now need more for my household. This bag could be essential on a camping or road trip, but it might also save your life when you’re not traveling.

Pick one up this holiday season as a very special gift for $349. You will have purchased peace of mind along with essentials you needed any way.

Want to design a less extensive, road trip bug-out bag?

For families who like to road trip or car camp, a car bug-out bag can be any kit that contains supplies and extras, such as MOLLE gear, that may be needed in an emergency while away from home.

Whatever type of bug out bag you create, be sure to stock it regularly for minor injuries, sickness, or weather conditions. We’ve never needed ours for a serious emergency, and hope we never do.

Start with any large backpack or duffel. We keep our basic bag, which we use in addition to our Seventy2 bag now, in our primary vehicle. You don’t want to put it anywhere it will need to be frequently moved. Ours is in the back, near the space reserved for the car jack and jumper cables.

What to put in your more basic road trip bug-out bag:

2-4 emergency blankets: These blankets are made of vacuum-metalized polyethylene and reflect 90% of your body heat, allowing you to stay warm despite their thin shape and low weight. They are the size of your palm when still folded, and can also be used as shelter or a ground cloth. We use SOL emergency blankets, which are less than $5 on Amazon.

1 small first aid kit: Ideally, you already have a family-sized first-aid kit in your car (if not, check out our recommendations). However, since your car bug-out bag is meant to be portable, opt for a smaller sized one. We use Adventure Medical Kits’ .5, which is housed in a lightweight, waterproof pouch and includes all the essentials (and not much else). At $15, you can’t make a cheaper one at this weight. Place some extra easy-access bandages in there, too. These nifty band-aids require only one hand to unpeel and place on a cut.

Gloves and winter hats for everyone: Reuse or buy a cheap pair of fleece or knit gloves for everyone in your family, and place them in the bag. Ditto for winter ‘beanie’ hats. These don’t need to be anything fancy; after all, you’ll want to wear your good ones regularly, and you’ll likely never use these. But in case of bad weather or the need to put chains on your tires, you’ll be glad to have some protection for your hands and heads. In winter months, we also add a lightweight jacket for everyone, which just stays in the bag until summer. Remember, you’ll have extra seasonally-appropriate clothing for everyone in your car already if you’re on a road trip or camping trip.

Pocket survival pack: These neat packs fit into your pocket, and include only the barest of essentials for outdoor survival. We have a pack in our backpacking gear, in the ‘just in case’ category, and one more in the car. In the case that someone needed to leave the shelter of the car to seek help, I’d want him or her to have this kit on them. Included is a whistle, mirror, sparker and tinder for an easy flame, and tiny portions of helpful items such as duct tape, safety pins, wire, and foil. It doesn’t seem like much now, but as a former Search and Rescue volunteer, I’ve seen people do amazing things with these items. We like the SOL pocket survival pack, because it comes with a waterproof card of instructions. Pick one up for under $30.

motorola-talkabout
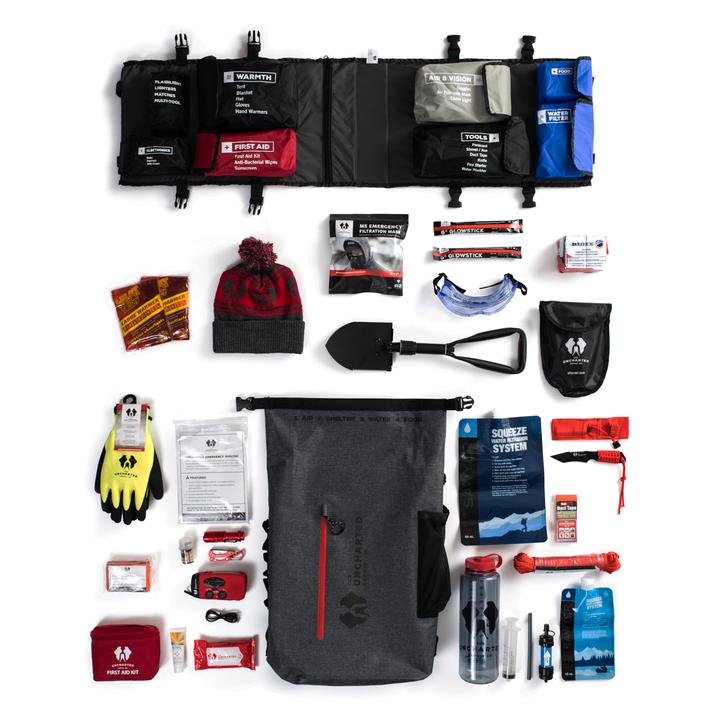
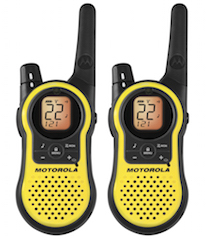
2-way radios: Sure, you have mobile phones, but as we all know, they can be unreliable. If you’re out of coverage area, low on battery power, or–unlikely but possible–if cellular service is down, you’ll want another way to communicate. We recently tried out the Motorola Talkabout 2-Way Radios (in other words, walkie-talkies), and they’ve now been added to our bug-out bag. Why we like them: they’re easy to juice up, they have a long range, and you can receive NOAA weather alerts through them. The Talkabout runs on either alkaline or rechargeable batteries (or can be charged using a mini-USB port, if you have access to that). They work in a 23 mile range, and has a scan feature which allows you to search a programmed list of channels. In the past, we’ve found that walkie-talkies can be useless if too many people are using them, but the Talkabout filters interference from non-Motorola units. They’re not toys, by any means, but still under $50 on Amazon.

Supplies for your car: Hopefully you already know where your car’s extra tire and jack are housed, but in addition, most families should carry chains for winter weather (depending on where you live), and jumper cables. We also store a small, collapsible shovel in our bag, which can (and has been) used to dig out of snow or mud.

Matches and firestarter: If you need to, you want to be able to make a fire for signaling help, warmth, or cooking. If you’re on a camping trip, you’ll have these supplies anyway, but we keep a waterproof case of matches and fire cubes in our bug-out bag all the time, so we don’t have to remember to grab them on each trip. What are fire cubes, you ask? These sugar-cube sized fire starters burn at 1300 F in any conditions…even a downpour. Use them to start a campfire or even boil water. Speaking of which…

Water: This is the only item we do not store in our bug-out bag, because we all carry personal water bottles with us in the car for any trip, so we already have them at the ready. For longer trips, however, we buy a case of water and place it in the back by the bag. If we don’t need it, we use this water on our travels, and buy more.

Want to be even more prepared? Have a water filter handy, or do what we do: pack your bug out bag with a LifeStraw or LifeStraw Go. This award-winning personal filtration system uses a filtering straw, so you have safe water to drink anywhere, anytime. We use ours on international travel days, too, so we get use of it regularly, not just during emergencies. After our son Nate lost his on a trip to Costa Rica, we replaced it immediately!

Basic foods: We don’t go overboard on this, which would probably dismay true preppers. But our bug-out bag is only meant for short term emergencies and even car-ride inconveniences, so we pack snacks with a long shelf life, like beef jerky and Nature Made granola bars. We change these snacks out every 2-3 months. I simply like knowing they’re in our bag should we get stuck in traffic for a very long time or need to leave our car for any reason.

amzn_assoc_placement = “adunit0”;
amzn_assoc_search_bar = “true”;
amzn_assoc_tracking_id = “pitstoforkid-20”;
amzn_assoc_ad_mode = “manual”;
amzn_assoc_ad_type = “smart”;
amzn_assoc_marketplace = “amazon”;
amzn_assoc_region = “US”;
amzn_assoc_title = “My Amazon Picks”;
amzn_assoc_linkid = “2b3ff3efebcf632ee007032e7c7a5424”;
amzn_assoc_asins = “B00EVGD2JK,B000G7YIL4,B001UE6MIO,B00H90PFOK”;

Find more Travel Gear We Use!

Do you have a car emergency bug-out bag? What’s in it?

Photo credit: Richard Riley

Camping packing lists and tips

Family camping trips are an excellent way to spend time together in the outdoors and enjoy a vacation on a budget, provided you have some camping tips and hacks up your sleeve. Otherwise, it can take as long to prepare and pack for a camping trip as the trip itself! To ensure that you’re ready for that next weekend trip to the woods, use the following camping packing lists and tips.

Coleman-tent

The Camp Kitchen

Organizing and packing your camp kitchen is often the most complicated part of preparing for a camping trip. The workaround is having dedicated camping pots and pans, utensils, and kitchen gadgets stored apart from your home kitchen, which will save you time and effort in packing and unpacking daily supplies. Here’s what you need:

Kitchen Packing List:

  • Camp stove: Opt for a lightweight backpacking stove or traditional car camping stove.
  • Fuel: Make sure you have the correct propane fuel for your stove.
  • Plates, cups, and eating utensils (1 per family member): Use paper products or opt for reusable mess kits, which are available in outdoor stores.
  • Tablecloth: Buy a cheap one at a dollar store.
  • Dishwashing tub: Opt for a plastic tub or nylon, sealed, collapsible tub.
  • Dishwashing supplies: Paper or cloth towels or dishrags; dish soap; and sponge.
  • Matches
  • Fire starter
  • Ice
  • Cooler
  • Tarp
  • Grill (optional): Most campsites provide a grill over the fire pit.
  • Camp table (optional): Helpful for organization, but not necessary.
  • Kitchen tools/utensils: Spatula, all-purpose knife, potholders, serving ladle, butter knife, tongs, long skewers for s’mores or meat-on-a-stick, and tin foil.

Try this kitchen packing hack: Store your kitchen tools and utensils in a toiletry bag or other small bag to keep them organized and clean between uses at a dusty campground. It will be easy to hang them from a tree branch for easy use when you’re at your site.

The Camp Sleeping Quarters

Everyone wants to be warm and cozy at night! Whether you’re camping in warm or colder climates, everyone in your family will need the essentials to ensure that they’re safe at night. Store tents and sleeping pads in a second large tote, making it easy to pack up the car and head to the campsite at any time.

camping-tips

Sleeping Packing List:

  • Tent(s): Opt for one large family tent or 2–3 smaller tents. Larger tents have the advantage of space, but small tents fit in cozier campsites.
  • Sleeping bags: Buy sleeping bags rated at 20 degrees F, unless you know you’ll be camping in colder climates. A 20–40 degrees F bag works for most camping experiences. Down or down-alternative bags pack down smaller and are lighter and warmer than cotton or nylon/polyester bags.
  • Sleeping pads: Opt for thick blow-up mattresses for car camping, or save space with backpacking pads that inflate with just a few breaths of air.
  • Ground tarp: Don’t skip the ground tarps. They protect your tent floor and keep the dew and cold at bay.
  • Towels and personal hygiene items: One per family member!
  • Flashlights or headlamps: One per family member. Everyone should have their own light source for safety and convenience.
  • Lantern: One per family will do. Ideally, your lantern can transition from kitchen area to tent and back.

Try this sleeping quarters hack: Buy a ground tarp one size larger than your tent, and use the overhanging space as a place to take off shoes and wipe off feet before entering the tent.

The Campfire Area

Camping just isn’t camping without a comforting campfire, right? The campfire area is important, but there’s good news: it’s easy to pack for!

Campfire area packing list:

  • Firewood: Buy on-site, or save money by buying it at a local grocery store.
  • Matches and fire starter: You’ll already have these in your camp kitchen supplies. The type of fire starter you use is up to you; we like fire disks or fire cubes.
  • Axe or hatchet: Useful for breaking down firewood. Store away from children.
  • Camp chairs: Some campsites include a bench around the fire ring, but for most, you’ll want collapsible camp chairs. To save space in the car, opt for the smaller, lighter versions sold in backpacking stores.
  • S’mores: Be sure to bring the ingredients for this tasty campfire treat!
  • Deck of cards or board game: Everyone enjoys playing a game around the fire.
  • Lantern: This item is already with your sleeping supplies!

Try this campfire area hack: Never bring firewood all the way from home. It takes up lots of room in your car or truck, which could otherwise be used for other items, and it could be banned from your campground if you’re driving any distance. Campgrounds often require local wood to be burned in an effort to reduce foreign insect species from invading new areas.

Miscellaneous Items Campers Love

Think you have everything you need? Probably not! Read the list of extras below and decide what you can’t live without!

  • Insect repellent or wristbands
  • Sunscreen
  • Toilet paper and shovel (if you don’t have a campground restroom)
  • Inflatable wading pool for small children to play in
  • Playpen for babies to stay off the dirt (sometimes)
  • Clothespins and a clothesline to hang wet clothing
  • Extra sheet or towel to hang in the tent to create “rooms”
  • Hammock
  • Baby wipes to clean hands and faces
  • Camera
  • Water/wading shoes
  • Small net and bucket to use in streams
  • Small toys for kids to use in camp
  • Bikes or scooters for larger campgrounds


Source: Fix.com Blog

Dealing with camping mishaps: Camping tips for families!

It’s almost camping season! If you’ve been reluctant to enter the wilderness with your family because of worries or fears, read on! Our camping tips address the most common camping mishaps, and how to deal!

Those who camp regularly know it’s not all sunshine and rainbows. Here’s what to expect from the unexpected and what to do when you encounter camping mishaps. Read on for camping hacks!

Coleman-tent

When The Weather Turns Against You

Bad weather is the most common mishap encountered by campers…even when car camping. Usually nothing more than an inconvenience or temporary delay of outdoor fun, weather can sometimes become dangerous. Here’s how to protect yourself from serious weather issues from mother nature.

Rain: It’s good to be prepared for rain when camping. Be sure to bring a reliable rain fly for your tent, rain jackets for everyone in the family and, if rain is predicted, an extra shelter or canvas tarp to put over eating and cooking areas. It can also help to bring an extra beach towel to use as an entry mat to your tent to wipe off dirty feet when campsites get muddy.

Wind: High winds can cause major problems for campers. If you are in a camper or RV, fold down all awnings and external structures in the case of high wind and, in tents, secure your shelter with guy lines and stakes. Beware of “widow makers” when pitching tents or parking RVs: these dead-yet-standing trees can fall over easily in high winds.

Heat: Always plan your tent site with shade in mind and look for campsites with trees, rocks, or vegetation that will provide some relief. Freeze jugs of water before departing home so you can have access to icy water along with homemade ice packs. Wet bandanas or other clothing to cool skin and camp near bodies of water for easy access.

Wildfires/lightning: A regular occurrence most summers in the western United States, wildfires can certainly ruin a camping trip. The good news: families in campgrounds will have advance warning of any needed evacuations. Check your state’s US Forest Service website for possible fires in the area of your campground and have a back-up plan in case of road closures or campground closures. To avoid lightning strikes, ensure your campsite is not the highest point in an open environment, and do not hike to vistas and peaks if lightning is possible. Cars and RVs (except canvas-topped or fiberglass), bathrooms wired with plumbing and electricity, and other wired buildings are safe places in a lightning storm. Tents are not.

Tip: For all weather-related issues, know the campground’s evacuation procedures before your arrival. You can find this information at a ranger station or check-in booth.

When Someone Becomes Injured or Sick

Minor illnesses and injuries are common while camping, and most can be addressed with a simple bandage or extra s’more for dessert. Prevent blisters before they start by wearing well-worn shoes and sandals while camping. If you’re prone to blisters, use moleskin or bandages specifically for blisters before you hike.

silver-falls-hike

Because you’re in the outdoors with less access to sterile environments, cuts and scrapes should be treated immediately to prevent infection. Always carry a standard first aid kit with antibiotic ointment packets and antiseptic wipes in addition to various-sized bandages.

If your campsite does not offer running water, such as a hike-in or backcountry site, beware of Giardiasis. Also known as Beaver Fever, Giardiasis is an intestinal illness caused by microscopic parasites. It’s caused by drinking untreated water and can result in diarrhea and dehydration. Campers at a campsite with running water (in developed countries) will not need to worry, but those camping where water is sourced from lakes or streams (or in undeveloped countries) will need to treat water before drinking. Be sure your camping gear includes a filter or pump system for your water bottle.

Finally, deal with those annoying buzzing creatures in the outdoors with topical anti-itch cream or hydrocortisone for minor bites and stings. Always carry Benadryl (oral) in case of swelling or discomfort, even if you don’t think you’re allergic to any type of insect.

Tip: For all health-related issues, know where the closest hospital is located and have local emergency numbers on hand.

Addressing Common Camping Nuisances

There are always a few things we’d rather not deal with while camping but that are hard to avoid. Here’s what to do about the worst offenders.

Difficult neighbors: When car camping at popular campgrounds, you’ll often have neighbors. Usually these camping buddies are outdoor lovers like you and will be quiet and courteous. But if they turn out to be disruptive neighbors, they can ruin your trip. Here’s what to do when faced with loud, arguing, or partying campers:

  • Speak with them directly, in a friendly manner.
  • Talk to a campground host. Each campground will have one or more of these citizen enforcers; their campsites will be marked as host campsites. The host should speak with the offending campers.
  • Ask to move campsites (if hosts cannot control the situation).
  • Call the local authorities if the situation makes you feel unsafe.
  • Follow up after your trip with the campground owners or government agency (if it’s a national or state park). They can’t take action that will help to prevent this issue in the future if complaints aren’t lodged.

Mosquitoes: Always a pest, and now a danger in some regions for those susceptible to the Zika virus, mosquitoes need to be controlled (as much as possible) within your campsite. Have a secure shelter to use when necessary (such as a tent or screen room), wear insect-repelling clothing, and use natural repelling remedies around camp. At night, make a campfire and let the wood smoke repel mosquitos for you!

Some mishaps are bound to arise while camping, and they can even make for great stories! Anticipating them and following our camping tips and tricks means you will be prepared and won’t allow them to define your whole trip.

Subscribe to our Pit Stops for Kids seasonal newsletter, and get an exclusive travel ‘cheat sheet’, free! Click here!

Pin for later!

Everything you need to know to avoid (or deal with) camping mishaps!
Source: Fix.com Blog